Audacity
Audacity is a free, open-source, and cross-platform audio software package. It is easy to use, very intuitive, and fast. It is particularly suited for making a single (long) recording of a speaker, after which you manually extract the relevant words/sentences from this raw recording.
- Download, install, and open Audacity:
- https://www.audacityteam.org/
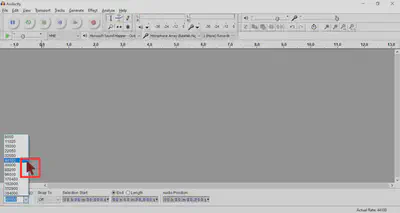
- First check the sampling frequency. Typically, 48 kHz or 44.1 kHz will do just fine.
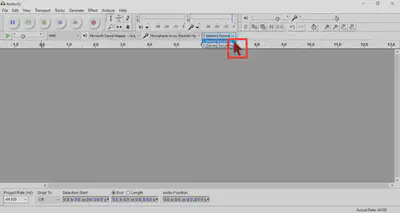
- Audacity’s default is to make stereo recordings, with each recording containing two channels:
- In most cases, it’s better to make mono recordings (with only one channel) to make annotating and manipulating the speech a lot easier. Change the settings at the top to MONO:
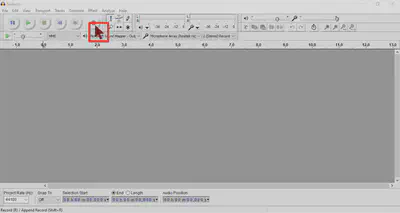
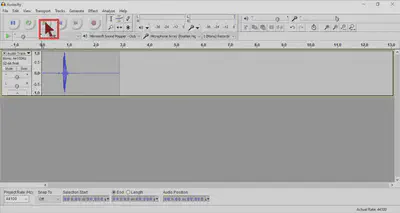
- Then click the red button to start a recording…
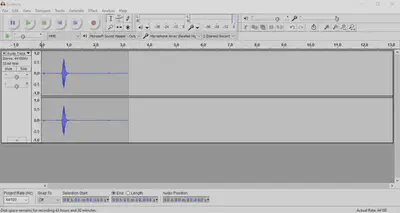
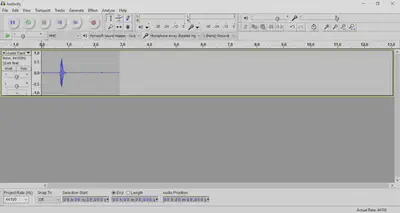
- …which should look something like this:
- When you’re done recording, click the yellow square to stop.
- Do not SAVE projects in Audacity, but instead EXPORT audio files. Go to: File > Export Audio…, and then click the ‘Save as type’ drop-down menu to select the file format. Select .wav for uncompressed (raw) audio which is best suited for speech manipulations, or .mp3 for compressed (processed) audio.
Export format, choose an Export location, and keep the other defaults (in particular, Split files based on: Tracks; Name files: Using Label/Track Name). Click Export and voila, you now have an .mp3 file for each .wav file.
Tips n tricks
But how to make recordings that are ‘clean’: with little noise and of good quality?
-
For longer recordings, ask your speaker to sit in a relaxed position that they can keep up for a longer period of time. People typically tend to slouch during a recording, changing the distance between them and the table mic, thus changing the intensity of speech appearing early vs. later in your recording. If you ask your speaker to try to ‘already slouch a little’, this can help avoid large variability in intensity.
-
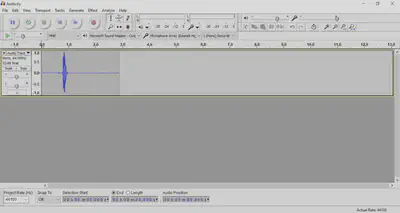
Before recording your items, start a dummy recording and ask the speaker to count to 100. Then adjust the volume/sensitivity/gain of the microphone. You want the average intensity of the speech to fall roughly in between 0.5 and -0.5 in Audacity. So this is good:
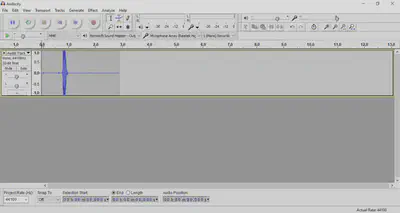
- This is risky because it’s approaching 1 and -1:
- This is bad because it’s outside 1 and -1.
- This is called ‘clippings’ and it’s very well audible in the signal. These two audio clips contain the same telephone number, but the first is clean and the second has clippings:
CLEAN
WITH CLIPPINGS
-
When boosting the volume/sensitivity/gain of the microphone, be aware that – by doing so – you may actually be boosting the background noise too. It’s often preferable to move the location of the mic closer to the speaker compared to amplifying the input signal.
-
When you need the mic to be particularly close to the speaker (e.g., when using a head-mounted mic), make sure the mic is not too close to the speakers lips as that will introduce puffs of loud noise for many stop consonants. Better to aim for the chin!
-
Why not ask the speaker to go through your list of items from top to bottom first, and then repeat all items from bottom to top? This will give you two recordings of each item, allowing you to select the best one. Moreover, items at the top and bottom of lists typically sound different from the rest. First items typically have loud intensity and raised pitch, while last items have low intensity and pitch. By switching the order of items, you may be able to circumvent some of these order effects.
Chopping up the recording
When you’ve finished recording with Audacity, and have extracted the audio as a .wav file, you will then need to isolate the individual items (e.g., words or sentences) from that one long recording. There’s different solutions for this task:
-
Do it by hand. Read the .wav file into Praat, create an empty TextGrid, and insert boundaries at the onset and offset of every item. Once you’re done, you select the Sound and TextGrid objects together in Praat, and select an option from the Extract menu, such as
Extract all intervals...orExtract non-empty intervals...and save the individual items. -
Go full automatic. You can use a forced-aligner to find the words inside your recording. We tend to use WebMAUS (for word- and phoneme-level annotations) or EasyAlign (for syllable-level annotations). In both cases, you provide the forced-aligner with the .wav file and a .txt file that contains the orthographic content of the recording (i.e., the prompts that your speaker was asked to read out). The forced-aligner will then try to find the words from the .txt file in the .wav file, providing a .TextGrid file as output.
However, often your speaker wasn’t perfect, fluffing their lines, repeating items several times before getting it right, or chucking in a few coughs and ‘uhm’s here and there. In that case, automatic forced-alignment is suboptimal. In such (commonly occurring) cases, you could consider:
- Go semi-automatic. Read your .wav file in Praat and click Annotate > To TextGrid (silences)…. Praat will then create a TextGrid for you, labeling silent intervals as ‘silence’ and intervals with speech as ‘sounding’. You can then go through this TextGrid manually and…
- …remove incorrectly detected ‘sounding’ intervals
- …adjust the boundaries of individual intervals
- …label the intervals correctly
- …extract the intervals for saving and further analysis/manipulation.
(actions (3) and (4) can be performed automatically using scripts in Praat).
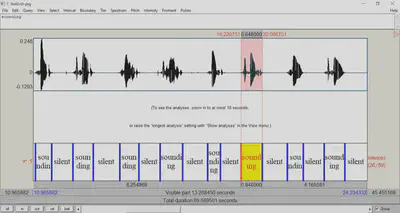
I’ve found that the default settings for the To TextGrid (silences) function are best adjusted to: Minimum pitch (Hz) = 50 (instead of the default 100) and Silence threshold (dB) = -40 (instead of the default -32). In my experience, this works considerably better especially for single-word recordings, but often also for full-sentence recordings.
Oh, and as I’m writing this, I see the latest versions of Praat have a new To TextGrid (speech activity) function. My initial impression is that the default settings for this function perform comparable to the ‘adjusted’ settings for To TextGrid (silences) suggested above.
SpeechRecorder
SpeechRecorder is also a free, open-source, and cross-platform audio software package. It takes a little more preparation to use it appropriately compared to Audacity, but an important advantage is that it allows users to efficiently record multiple individual items (instead of one massively long recording). This means that the ‘chopping up recordings into items’ part of the workflow can be (largely) skipped… but see this advice below.
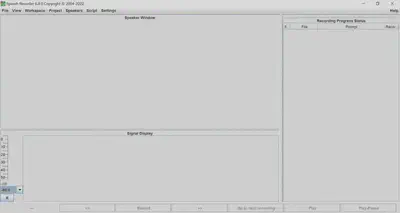
- Download, install, and open SpeechRecorder:
- https://www.bas.uni-muenchen.de/Bas/software/speechrecorder/
- Go to Project > New, and enter a name for your project
- The directory for the audio output is
C:/Users/hanbos/speechrecorder/[myProjectName]/ - In the ‘Speaker data’ window that pops up, add a speaker by clicking Add and then Select.
- If you have multiple talkers, you can add several speakers, and by selecting one of them, you add a speaker identifier to the filename of each audio output file.
- Go to Project > Preferences and find the Recording tab to change the Format settings, such as the sampling frequency (e.g., 44.1 or 48 kHz) and the number of channels (usually mono so 1 channel).
- Then go to Script > Import text table… and select a headerless tab-separated file with 2 columns:
- filenames without extension (e.g.,
item42_cacao_isolated) - prompts (e.g.,
cacao)
- filenames without extension (e.g.,
- SpeechRecorder will then look something like this:
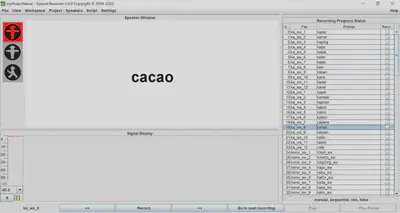
- Click Record at the bottom to start a recording. The traffic light will go from Red, to Orange, to Green, after which the speaker pronounces the prompt on screen. Click Stop to stop the recording.
- If you are happy with the recording, click [»] to proceed to the next prompt. SpeechRecorder will then save the recording with the appropriate filename in the project folder and present the next prompt.
- However, if you are unhappy with the recording, click Record again to overwrite the previous take.
- See these tips n tricks about how to control audio quality.
Trim silence
Even though SpeechRecorder gives you separate recordings for individual items, it does often produce recordings with plenty of leading and trailing silence (i.e., before and after the critical word/sentence). There are several options to trim these silent intervals:
-
Change SpeechRecorder settings. Go to Project > Preferences, click the Recording tab and then the Options tab. Reduce the
default prerecording delay(default is 1000 ms) and thedefault postrecording delay(default is 500 ms) to lower values. NOTE: this will also affect the traffic light behavior (i.e., recordings may start instantly). -
Use forced alignment. Because SpeechRecorder allows the user to re-record items that were fluffed, it typically produces recordings that are easily forced-aligned. We tend to use WebMAUS (for word- and phoneme-level annotations) or EasyAlign (for syllable-level annotations). In both cases, you provide the forced-aligner with the .wav file and a .txt file that contains the orthographic content of the recording (i.e., the prompts that your speaker was asked to read out). The forced-aligner will then try to find the words from the .txt file in the .wav file, providing a .TextGrid file as output. Finally, you can use this TextGrid to extract only the intervals of interest, removing leading and trailing silences.
Happy recording!